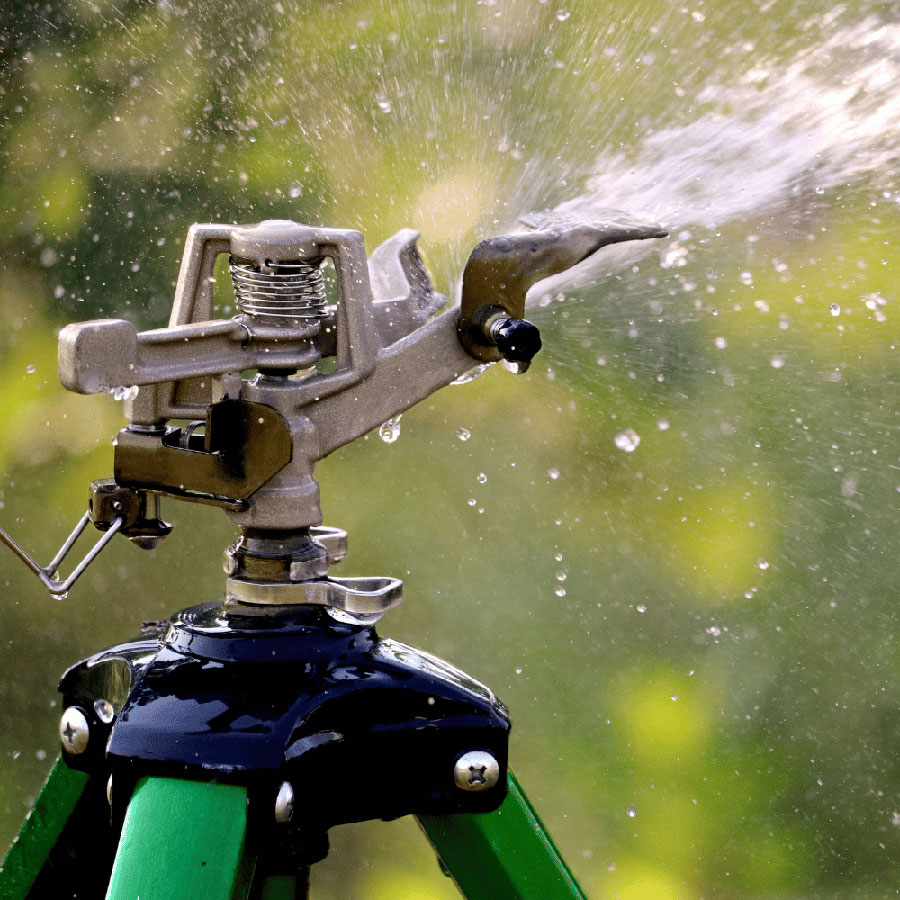
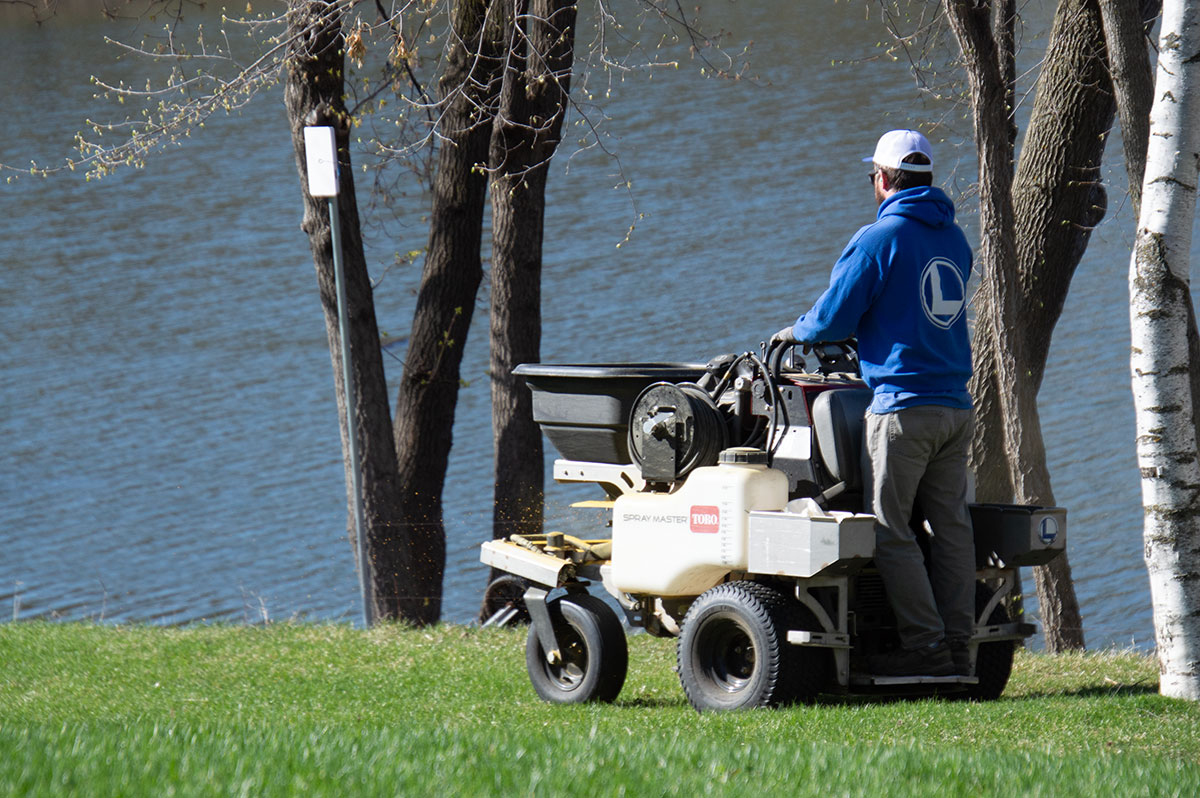
A lush, green lawn doesn’t require constant watering. In fact, one of the biggest mistakes homeowners make is watering too often. The secret to a healthier lawn—and lower water bills—is watering smarter, not more.
Water Deeply, Not Daily
Frequent, shallow watering encourages grass roots to stay near the surface, making your lawn more vulnerable to drought and heat stress. Instead, water deeply and less often. Deep watering encourages roots to grow several inches into the soil, creating a stronger, more resilient lawn that can better withstand dry conditions.
Most established lawns need about one inch of water per week, including rainfall. Before turning on the sprinkler, consider how much rain your lawn has already received and water only when necessary.
Water Early in the Morning
The best time to water is between 4 a.m. and 10 a.m. Cooler morning temperatures reduce evaporation, allowing more water to soak into the soil. Morning watering also gives grass time to dry during the day, reducing the risk of fungal diseases that thrive in damp conditions.
Avoid watering in the evening whenever possible, as moisture that remains on the lawn overnight can encourage disease and insect activity.
Know Your Soil
Different soil types absorb and hold water differently.
Sandy soils drain quickly and may require more frequent watering with smaller amounts.
Clay soils hold moisture longer, so they benefit from less frequent but deeper watering.
Pay attention to your lawn’s actual needs and adjust based on weather, rainfall, and soil conditions.
Test Before You Water
Instead of watering on a set schedule, check your soil first. If the top several inches of soil are dry, it’s time to water. A simple screwdriver or small shovel can help determine how deeply moisture has penetrated.
You can also use a small container, such as a tuna can, to measure how much water your sprinkler system delivers. This helps ensure your lawn receives the right amount without wasting water.
Help Your Lawn Hold Moisture
Watering is only one part of maintaining a healthy lawn. You can significantly reduce water needs by:
Mowing at a height of 3 inches or higher to encourage deeper root growth.
Leaving grass clippings on the lawn to help retain moisture.
Improve soil health with compost or organic matter.
Installing rain sensors or smart irrigation controllers that automatically adjust watering based on weather conditions.
Don’t Forget Trees and Garden Beds
Your lawn isn’t the only thing that needs water. Newly planted trees and shrubs require consistent watering while establishing their root systems. Garden beds benefit from watering at the base of plants instead of overhead, helping reduce disease while delivering moisture where it’s needed most.
Applying 2 to 3 inches of organic mulch around trees, shrubs, and garden plants also helps conserve soil moisture and reduces evaporation.
Water Wisely
Healthy landscapes are built through thoughtful watering practices rather than frequent irrigation. By watering deeply, timing irrigation for the early morning, monitoring rainfall, and improving soil health, you can create a lawn that’s more drought-tolerant, healthier, and easier to maintain while conserving one of our most valuable natural resources.
Minnesota homeowners know that a beautiful lawn can be challenging even in ideal conditions. Add dense tree cover, north-facing yards, long winters, and limited sunlight, and growing healthy turf becomes even more difficult. Shady lawns often struggle with thin grass, moss growth, soil compaction, and increased disease pressure.
The good news is that a thriving lawn in low-light conditions is possible — especially when you focus on building healthy soil and using organic lawn care practices that work with Minnesota’s climate instead of against it.
Dominic Petrella is an Assistant Professor of Managed Turfgrass Systems in the Department of Horticultural Science at the University of Minnesota (@umnhorticulture). He says that plants with less sunlight to support photosynthesis starve themselves over time, so grass can look good one year, but look worse year after year in low-light conditions.
Why Shade Creates Problems for Turf
Grass needs sunlight to photosynthesize and produce energy. Most turf varieties perform best with at least 6 hours of direct sunlight per day. In shaded areas, lawns receive less energy, which leads to:
Thin or patchy turf
Weak root systems
Increased moisture retention
Higher risk of fungal diseases
Slower recovery from foot traffic
More weed and moss invasion
Petrella adds that Morning dew in shady conditions increases turf stress.
In Minnesota, these problems are amplified because cool-season grasses already have a relatively short growing season. Long winters and spring snowmelt can leave shaded lawns stressed before summer even begins.
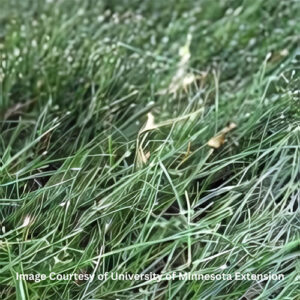
The Best Grass Types for Shade in Minnesota
Not all turf grasses respond to shade the same way. Choosing the right seed blend is one of the most important steps for success.
Fescues
Fine fescues are among the most shade-tolerant cool-season grasses available. They require less fertilizer, use less water, and fit naturally into organic lawn care programs.
Benefits include:
Excellent shade tolerance
Lower nutrient requirements
Improved drought resistance
Softer texture
Reduced mowing frequency
Petrella points out that hard fescue looks better in shade than tall fescue.
Turf-Type Tall Fescue
Tall fescue can also perform well in partial shade, especially in lawns with moderate foot traffic. Its deeper roots help it tolerate stress more effectively.
Kentucky Bluegrass (Limited Use)
Kentucky bluegrass is popular in Minnesota but generally struggles in dense shade. In low-light conditions, it should only be used as part of a balanced seed blend rather than as a standalone turf type.
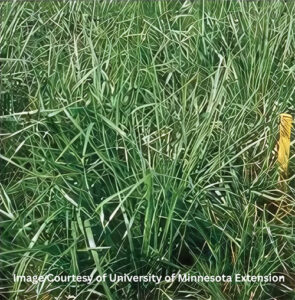
Poa Trivialis
Poa trivialis is a rough stalk bluegrass that is an invasive perennial grass weed. Petrella says that it thrives in moist soils and in lawns and parks with heavy to moderate shade from trees and buildings.
Penn State Extension explains that Poa trivialis has a perennial life cycle. It produces runners or stolons, which allow it to spread horizontally and creep over desirable grasses forming roughly circular patches. During periods of cool, moist conditions in spring, the vertical growth rate of P. trivialis can be 2-3 times faster than Kentucky bluegrass.
They go on to caution that In non-irrigated turf, during periods of high-temperature stress and/or drought in summer, P. trivialis begins to decline and foliage turns brown, leaving poor quality turf and openings for other weeds to develop. And its yellow-green color, coarse-textured leaf blades, and patchy appearance are often objectionable to homeowners and professional turf managers in stands of cool-season turfgrass.
Organic Lawn Care Strategies for Shady Lawns
Shaded turf requires a different management approach than full-sun lawns. Organic practices can improve soil biology and help grass become more resilient naturally.
1. Improve Soil Health First
Healthy soil is the foundation of healthy turf. In shady environments, compacted or poorly drained soil can quickly weaken grass.
Organic lawn care focuses on:
Increasing microbial activity
Building organic matter
Improving soil structure
Enhancing root development naturally
Core aeration combined with compost applications can dramatically improve oxygen flow and water infiltration in shaded lawns.
2. Reduce Fertilizer Stress
Overfertilizing shaded grass often creates weak growth that is more susceptible to disease. After the turf is established, be careful not to apply too much nitrogen. Petrella recommends reducing nitrogen in shaded areas to 2lbs/N/year.
Organic fertilizers release nutrients slowly, allowing turf to grow steadily without excessive top growth. This helps grass conserve energy in lower-light conditions.
A balanced organic program also supports:
Stronger roots
Better stress tolerance
Improved disease resistance
More consistent color
3. Mow Higher
One of the simplest ways to improve shaded turf is to raise the mowing height.
Taller grass blades:
Capture more sunlight
Promote deeper roots
Shade out weeds
Reduce moisture evaporation
For most Minnesota lawns in shade, maintaining grass at 3 to 4 inches is ideal.
4. Water Carefully
Shaded areas dry out more slowly than sunny parts of the lawn. Overwatering creates ideal conditions for fungal diseases and moss growth.
Instead of frequent shallow watering:
Water deeply and infrequently
Allow soil to partially dry between watering cycles
Water early in the morning to reduce overnight moisture
Organic soils with higher biological activity also retain moisture more effectively, reducing irrigation needs over time.
5. Prune Trees Strategically
Even a small increase in sunlight and airflow can make a major difference.
Selective pruning can:
Improve light penetration
Increase air circulation
Reduce disease pressure
Encourage stronger turf growth
In many cases, thinning lower tree branches is enough to significantly improve lawn performance without sacrificing shade or landscape beauty.
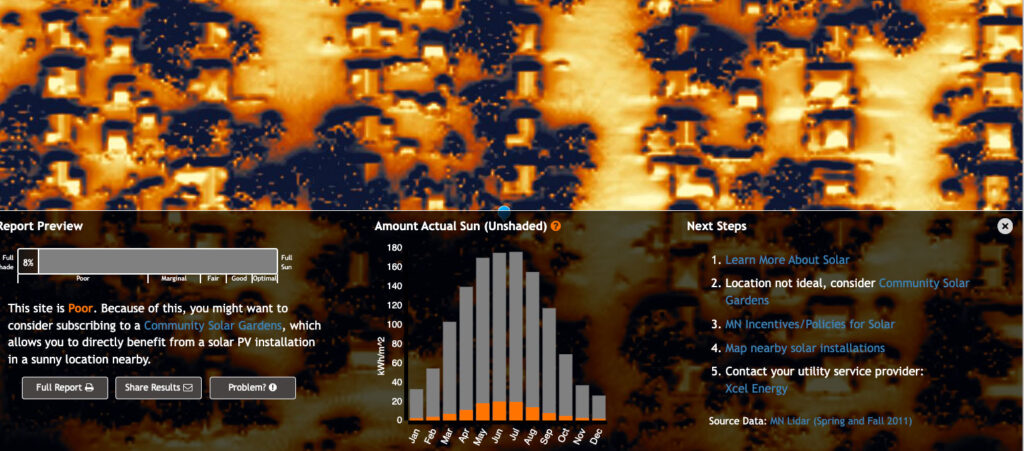
6. Use Shade Maps
Petrella encourages the use of free shadow maps to map out how light changes throughout the day and time of year. While this app is intended to gauge whether a site is appropriate for a solar installation, it has great information about the amount of sunlight at a specific location, helping better identify if there are low light challenges for growing grass
The picture above shows the results for an address in the SW Metro. The bar graph on the bottom shows that this property has challenges receiving enough sunlight for its turf.
Common Lawn Diseases in Shady Minnesota Turf
Low-light lawns are more vulnerable to fungal issues because moisture lingers longer on grass blades.
Common diseases include:
Snow mold
Red thread
Leaf spot
Powdery mildew
Organic lawn care helps reduce disease pressure by improving soil balance rather than relying heavily on synthetic fungicides. Proper mowing, watering, aeration, and nutrient management all contribute to a healthier ecosystem that naturally resists disease.
When Grass May Not Be the Best Option
Sometimes dense shade makes traditional turf unrealistic. If an area receives fewer than 3 hours of direct sunlight daily, alternative landscaping solutions may provide better long-term results.
Options include:
Native groundcovers
Woodland gardens
Mulched pathways
Pollinator-friendly shade plantings
An organic lawn care approach evaluates the entire landscape ecosystem — not just the grass.
A Smarter Approach to Shade Lawns
Shady lawns in Minnesota require patience and a customized strategy. Instead of forcing rapid growth with synthetic fertilizers, organic lawn care focuses on strengthening the soil, selecting appropriate grass varieties, and creating conditions where turf can thrive naturally.
With the right approach, even difficult low-light areas can become healthier, greener, and more resilient year after year.
Top of Form
Bottom of Form
If your lawn struggles under trees or in shaded areas, contact the experts at Organic Lawns by LUNSETH for an organic treatment program, or landscaping design – tailored to Minnesota conditions that can help restore balance naturally – without unnecessary chemicals or harsh inputs.
The Importance of Using Organic Weed Control in the Spring
The University of Minnesota Extension Service stresses the importance of getting Minnesota lawn weeds under control in the spring. There are 2 organic methods that are most effective accomplishing this: corn gluten and cultural practices.
Corn Gluten: Organic Pre-Emergent Herbicide
Corn gluten is a byproduct of the wet-milling process of corn and is an effective pre-emergent weed control that can prevent many annual weeds, like crabgrass, over time. The protein in the corn gluten acts on germinating seeds to inhibit root growth. Organic Lawns by LUNSETH uses non-GMO, organic corn gluten meal (CGM).
Timing and application rates greatly affect the success of corn gluten meal. The best time to apply it is in the early spring. Heavy rates are necessary for weed prevention. U of M Extension says that for control of annual summer grasses such as crabgrass, either apply it in early May, or once the temperature in the top inch of soil, measured early in the day, is consistently in the 50 to 55 °F range .
An added benefit to corn gluten is it also contains 10% nitrogen by weight and has a slow-release fertilizing effect when applied to home lawns.
Cultural Practices
Cultural practices offer a completely organic solution to weed control. It’s hard because you do all the work, but it’s very effective because it generates habits and processes that consistently favors the grass plants rather than the weeds.
The U of M Extension offers these cultural control solutions:
Raising or lowering mowing height.
Changing how often you mow.
Lengthening or shortening time between watering.
Increasing or decreasing how much and how often you apply fertilizer.
Aerating the soil by allowing air, water and nutrients to reach the grass roots.
Hand-weeding or pulling weeds is also an effective way to get rid of weeds from small lawn areas.
The best time to pull weeds is after a good rain or thorough watering. Hand-weeding is low-cost but labor-intensive. Several tools on the market will help when you’re hand-pulling weeds.
A combination of proper cultural practices and use of corn gluten as a pre-emergent herbicide is a good approach to controlling lawn weeds organically and effectively. If you have a question using corn gluten on your yard or would like help getting your yard ready for spring and summer, contact the experts at Organic Lawns by LUNSETH.
When it comes to building a thick, healthy lawn in Minnesota, dormant seeding (also called “frost seeding”) offers some compelling advantages. Based on research and recommendations from the UMN Extension, it’s a low-risk, smart way to improve turf density — especially in our cold-climate conditions.
Here’s why dormant seeding is worth considering, particularly for Minnesota homeowners:
Key Advantages of Dormant Seeding
1. Minimal Site Preparation
One of the biggest perks of dormant seeding is that it requires very little soil disruption. According to UMN Extension, often no soil tilling or heavy prep is needed — you can simply broadcast seed directly over thin turf. This simplicity makes dormant seeding less labor-intensive than a full spring or fall renovation.
For minor overseeding, you don’t even need to rake: seed does not have to be raked in.
2. Improved Seed-to-Soil Contact Through Freeze-Thaw Cycles
Minnesota’s winter weather actually helps dormant seeding succeed. The natural freeze–thaw cycles push the seed into the soil, promoting strong seed-to-soil contact — which is crucial for good germination once spring arrives.
Better contact means that more of your seed will survive and produce healthy seedlings.
3. Flexible Timing for Seeding
Dormant seeding offers a wider window than traditional spring or fall seeding:
In Minnesota, the ideal dormant-seeding period is when soil temperatures are below 40°F, which usually happens from early November to mid-March.
This longer window means you can plan seeding when it’s most convenient and safe, rather than being squeezed into a narrow spring or fall timeframe.
4. Reduced Watering Needs
Because dormant seeding takes place over winter, seedlings benefit from snowmelt and natural precipitation in early spring. UMN Extension notes that this reduces the need for intensive watering immediately after seeding.
When the seedlings emerge, you may need to water if conditions are dry, but the reliance on supplemental irrigation early on is generally lower than for spring-seeded lawns.
5. Early Spring Growth Before Weeds
One of the biggest competitive advantages of dormant seeding: by the time common spring weeds (like crabgrass) start to germinate, your new grass has a head start.
The dormant seed germinates as soon as soil warms, so seedlings can establish before weeds become a serious problem.
This early emergence helps foster denser, more competitive turf.
Trade-Offs & Things to Watch Out For
Dormant seeding is powerful, but it’s not without its trade-offs:
Risk of Dry Spring: If the spring after seeding is unusually warm and dry, seedlings might struggle if they don’t receive enough moisture.
Potential Seed Loss: While not always observed, there is a risk of seed predation (e.g., by birds) in bare or thin spots. UMN Extension suggests late-winter seeding to reduce this risk, or using a germination blanket on more exposed areas.
Slope Erosion: On steep or exposed slopes, you may need extra measures — like erosion blankets — to keep seed from washing away.
Best Practices for Dormant Seeding in Minnesota
Here are some UMN Extension–recommended tips to maximize the success of dormant seeding:
Choose the Right Seed Mix
Use cool-season grasses well suited to Minnesota: Kentucky bluegrass, fine fescues, or tall fescue.
Buy 10–20% more seed than you think you’ll need because you may need to overseed thin areas in the spring.
Prep Smartly
Clear excessive leaf litter so seeds can reach the soil
For minimal disturbance, skip tilling; but for bare soil or slopes, consider a germination or erosion-control blanket.
Seed Correctly
Spread seed in dry conditions, using a drop spreader for large areas.
Apply half the seed rate, then spread again in the opposite direction for better coverage.
Do not rake after spreading; the freeze-thaw cycle will do the work of incorporating the seed.
Manage in Spring
As temperatures rise above ~40°F, seedlings may begin to germinate. Monitor and water if needed.
Once most seedlings are about 3 inches tall, mow for the first time.
Conclusion
In summary, dormant seeding is a highly effective, low-maintenance strategy for Minnesota lawns. By leveraging natural winter processes, it helps you establish or renovate turf with minimal preparation, less watering pressure, and an earlier start than traditional seeding. While it’s not without risks — spring weather fluctuations and moisture — the benefits often outweigh the drawbacks when done thoughtfully.
If you’re looking to thicken your lawn, renovate thin or bare spots, or reduce spring seeding stress, dormant seeding is definitely worth a try. Let our team help so you have a healthy green lawn in the spring. Contact the experts at Organic Lawns by LUNSETH to take the first step toward a greener, healthier, chemical-free lawn in 2026.
Autumn is here and the trees are shedding their leaves. Your yard is entering a critical period that can affect next spring’s growth. Fall yard maintenance isn’t just about keeping things tidy—it’s about giving your lawn and landscape the care they need to rest and regenerate. From deciding whether to rake or mulch those fallen leaves, to giving your grass one last proper mowing, to knowing when to do some dormant pruning, now’s the moment to develop a plan so your outdoor spaces have a healthy, beautiful comeback when warmer days return. Here are some helpful tips from the University of Minnesota Extension Service.
Rake or Mulch
Mulching leaves into your lawn isn’t just sustainable – it’s an effective practice for healthier turfgrass. Mulch regularly when leaves are dry, and double pass for a finer mulch. This enables them to break down quickly and integrate into the lawn and saves you the labor of picking them up.
While mulched leaves do not return as much nitrogen as grass clippings, this still reduces the need for supplemental fertilizer and is a more eco-friendly and cost-effective practice.
In addition to releasing nutrients, decomposing leaves improve soil structure. The improved soil structure leads to better water infiltration, moisture retention, and root growth. It also improves access to nutrients, water, and air.
Leaf mulching is also very effective as a weed preventative as it covers bare spots and inhibits weed seed germination.
But, there’s a point when excessive leaves left on the surface can damage the lawn in the spring. For example, excessive tree leaf residue can promote snow mold damage.
The extension service recommends mulching tree leaves until you can only see about half of the lawn surface. When less than 50% of the lawn is visible, begin bagging the tree leaves to compost them off-site.
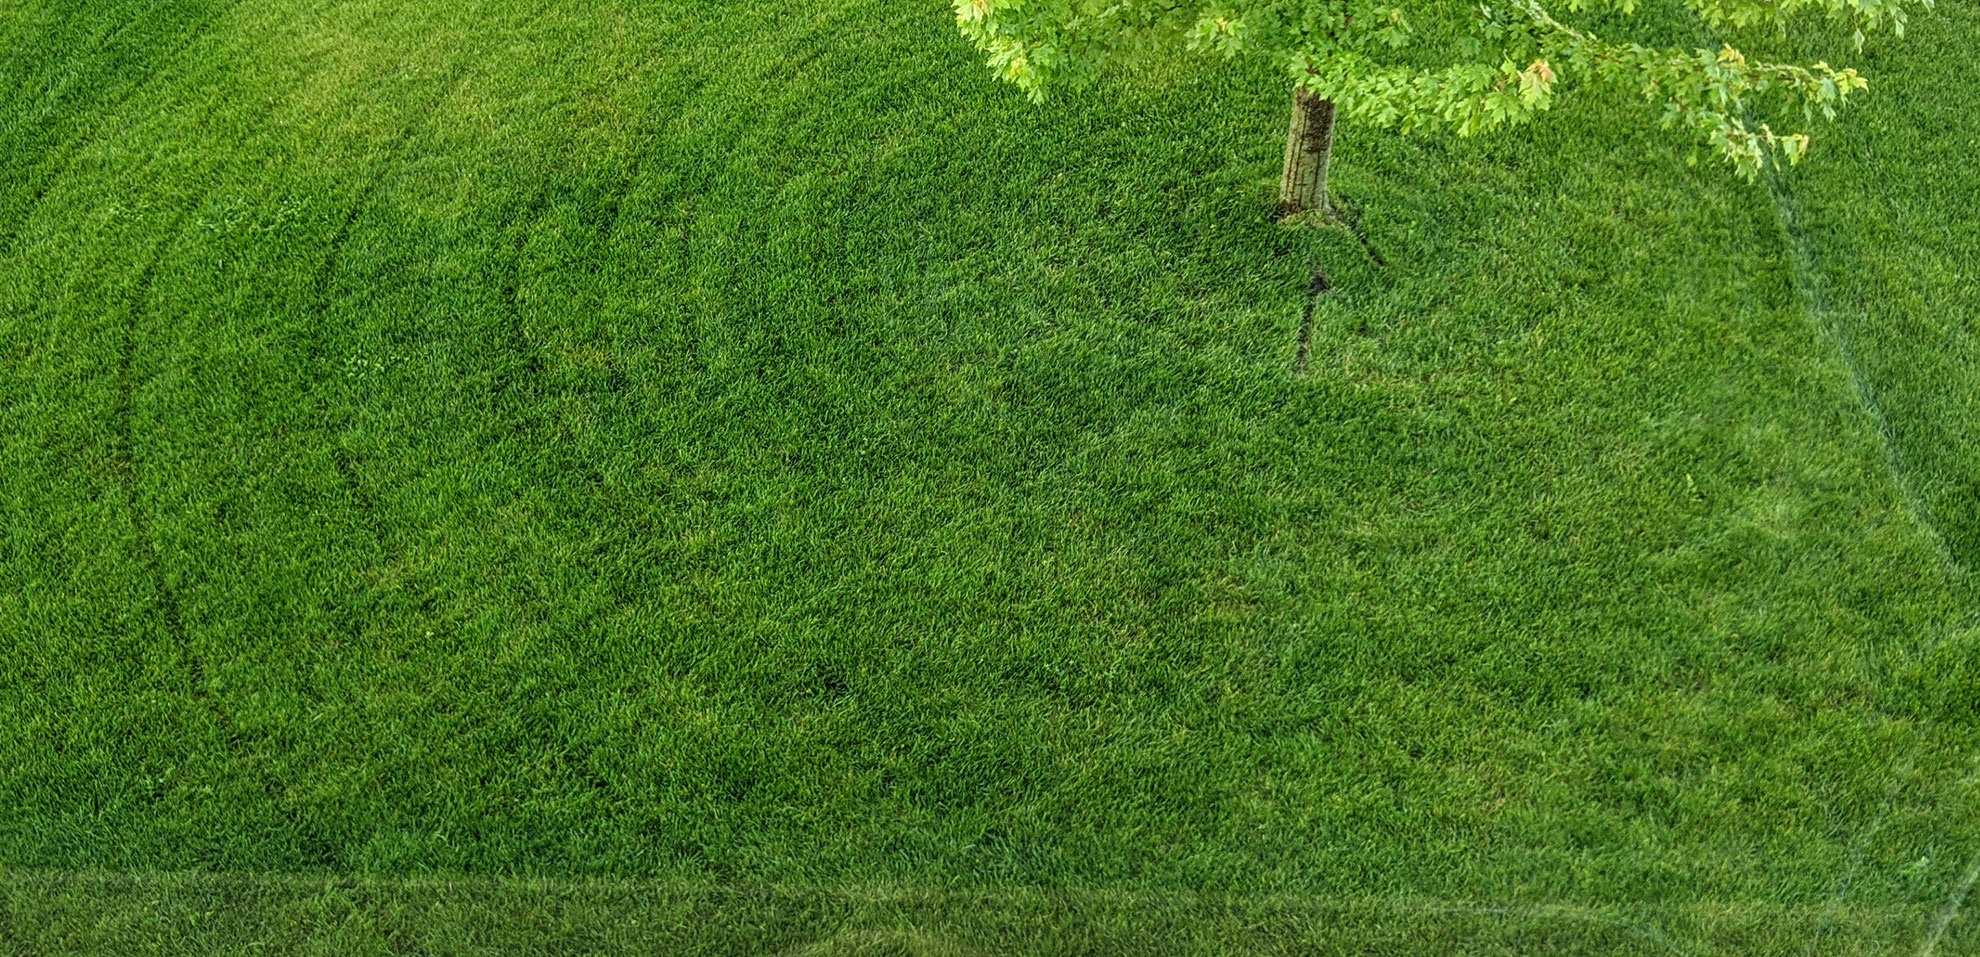
Mowing Grass
Should you mow your lawn shorter going into the winter? Extension says it depends. Some of the benefits of mowing your lawn a little shorter:
Makes collecting tree leaf litter easier.
Reduces the risk of snow mold diseases.
Reduces damage from burrowing rodents like voles.
Helps with dormant seeding.
But they caution not to lower the mowing height too much all at once, and not any lower than 2 inches after mowing. In general, never cut more than one-third of grass height in a single cutting – this might stress the grass plants going into winter.
Wait to Prune!
Fall is not the time to start pruning back your trees and bushes. The best time to prune is in the late winter, just before spring growth starts. This way the fresh wounds are exposed for only a short length of time. Then the new growth begins the wound sealing process.
Pruning at the proper time can avoid certain disease and physiological problems:
Need Help Preparing for Winter?
Let our team help you get your yard ready for the winter, so you have a healthy green lawn in the spring. Contact the experts at Organic Lawns by LUNSETH to take the first step toward a greener, healthier, chemical-free lawn in 2026.
Applying organic fertilizer and weed control in the fall is important. The fertilizer provides slow-release nutrients that strengthen root systems, store energy for winter survival, and improve the overall health of plants and soil. Organic weed control makes it harder for weeds to overwinter, helping your lawn have less weeds in spring by winning the competition with weeds for resources. Using fertilizer and weed control in the fall leads to a more resilient lawn and better plant growth in the spring.
Benefits of Fall Organic Fertilizer
Organic fertilizers build a healthy soil ecosystem and improve soil quality over time, creating a sustainable foundation for healthy plants.
Promotes Root Growth
As plants shift to root development in the fall, organic fertilizers provide essential nutrients for strong root systems, improving their ability to survive harsh conditions.
Supports Nutrient Storage
Fall fertilization helps plants store essential nutrients in their roots and other tissues, providing a reserve to survive winter dormancy and fuel new growth in the spring.
Enhances Winter Resilience
The stored nutrients and strengthened root systems make plants more resistant to winter stress, diseases, and environmental damage, improving their overall survival and health.
Organic fertilizers release nutrients slowly, providing a steady supply of food to plants throughout the fall and spring.
Improves Soil Health
Unlike synthetic fertilizers, organic options directly contribute to improving the soil’s physical, chemical, and biological properties, creating a healthier environment for plants to thrive.
Organic fertilizers feed beneficial soil microbes, which improve soil structure over time. This fosters a healthier, more sustainable soil ecosystem.
Encourages Earlier Spring Growth
The nutrients stored over winter give plants a head start in the spring, allowing for faster green-up and earlier, and stronger, growth.
Recovers from Summer Stress
Organic fertilizers can help repair damage from summer heat, drought, and heavy foot traffic by replenishing nutrients and promoting overall recovery.
Why Fall is Key for Organic Weed Control
Fall is the best time for organic weed control because it , targets perennial weeds when they’re at their weakest, and allows for a healthy, weed-free lawn in spring by outcompeting weeds for resources.
Targeting Perennial Weeds
Broadleaf perennials like dandelions and clover move nutrients to their roots for winter storage in the fall. Applying organic controls now is more effective at suppressing the entire plant, including its roots. The plants are unable to recover before winter, meaning they have a lower chance of returning in the spring.
Promotes a Healthy Spring Lawn
By suppressing weeds in the fall, you help your grass better compete for the necessary water, sunlight, and nutrients needed to be strong and dense in the spring.
The Right Grass Seed Leads to Spring Success
The seed used at Organic Lawns by LUNSETH is specially selected for winter resilience, ice cover tolerance, and disease resistance. Contact the experts at Organic Lawns by LUNSETH to take the first step toward a greener, healthier, chemical-free lawn in 2026.
At Organic Lawns by LUNSETH we believe organic lawn care is about working with nature—not against it. And that starts with understanding the unique conditions of our state and selecting the right grass seed for the job. This month we review why the right seed matters, the best types of grass seed for Minnesota lawns, and red flags about generic seed mixes.
Minnesota’s Climate: A Lawn-Care Challenge and Opportunity
Minnesota lawns face a wide range of conditions throughout the year—icy winters, wet springs, humid summers, and dry spells in between. That means your grass seed needs to be hardy, adaptable, and suited for cool-season growth.
Unlike other parts of the country, Minnesota lawns do best with cool-season grasses—varieties that thrive in spring and fall, when temperatures are milder.
Why the Right Seed Matters in Organic Lawn Care
Organic lawn care relies on building long-term soil health and resilience. The wrong seed makes achieving those goals difficult by requiring more water, more fertilizers, or more pesticides—exactly what we’re trying to avoid.
Here’s why buying the right seed pays off:
Reduced Weed Pressure – High-quality, allelopathic, grass seed creates a thick, healthy lawn that naturally crowds out weeds..
Less Watering – low-maintenance grass species require less irrigation.
Stronger Roots – The right grass seed means deeper roots, which equals better drought resistance and less stress.
Fewer Inputs – You won’t need to add synthetic fertilizers or harsh chemicals when your lawn is already thriving.
Fine fescue is drought, shade, and salt-tolerant, but doesn’t do well in extreme heat. It has lower maintenance requirements, including less irrigation, mowing, and fertilizing. But, do not mow in the summer heat. Fertilize in the fall if needed.
A mix of strong creeping red, Chewings, and hard fescue is excellent for home lawns.
Tall fescue
Tall fescue is one of the most drought-tolerant turfgrasses for Minnesota due to deep, extensive roots. And it can be used in the shade. It also tolerates wear and traffic. Be patient, though, because it has a slow spring green-up.
Make sure to purchase turf-type tall fescues for lawns. Seeding in the spring helps the grass survive winter better in the first year. Do not plant in areas that hold ice in the winter.
Beware of Cheap or Generic Seed Mixes
Not all grass seed is created equal. Many big-box store brands contain:
Low germination rates
Invasive weed seeds
Species that don’t perform well in Minnesota’s climate
That’s why LUNSETH always recommend buying regionally appropriate, high-quality, and preferably certified organic grass seed from trusted suppliers. Our general rules include
When in doubt, buy the most expensive because it’s most likely to germinate
Don’t buy anything that includes unknown varieties
Try not to buy anything that says annual because it won’t overwinter
Look at the back of the seed bag and follow the below guidelines:
Purity > 85% Germination > 85% Weed seed < 0.3% Other crop < 0.5% Inert matter < 8% Date tested = within the last 9-months
Need Help Choosing the Right Grass Seed?
Let our team take the guesswork out of grass seed selection. Whether you’re starting a new lawn or overseeding an old one, we help homeowners choose and sow seed blends that are tailored to their soil, sun conditions, and usage needs—without compromising your organic goals. Contact the experts at Organic Lawns by LUNSETH to take the first step toward a greener, healthier, chemical-free lawn
The Twin Cities has had consistent rainfall during the summer of 2025, with many of the storms being torrential. Research shows that this is part of a new weather pattern created by climate change, and now we’re approaching the time of year when we can go for long stretches without significant rain. But you have options to help maintain your lawn during these extreme conditions.
Weather Extremes – More Rain & More Drought
The University of Minnesota Climate Adaptation Partnership predicts that as climate change continues, “we expect more frequent and intense heavy rain events, with long dry periods in between.” They go on to say that “the length of consecutive dry days (CDD) is projected to increase more in the Midwest than in any region in the United States, up to 25% by 2100. This means that if we historically expected a dry period to last 8 days, we might expect it to last 10 days in the end of this century. We also expect a decrease in overall summer precipitation and a decrease in light rain events, but an increase in moderate and heavy rain events.
Turf Options
This is the time when our yards are getting a combination of the most intense sunlight and extreme heat of the season. Many grasses will reach their wilting point and will go dormant under these conditions. Luckily, grasses won’t start to die until they have 40 days of no moisture. But there are many varieties of grasses that can tolerate these environments better, leaving you with a green lawn even during drought.
“Among the fine fescues, hard fescues have excellent drought tolerance. Chewings fescue and slender creeping red fescue have good to excellent drought tolerance. And strong creeping red fescues have good drought tolerance.”
Organic compost tea is a water-based extract of compost that can be effectively used in organic turf management. It’s made of just two simple ingredients: compost and water. Good compost is successfully aerated, alllowing it to maintain oxygen levels necessary for aerobic functioning. It’s also necessary that the compost consists of the right balance of chemical compounds, is rich in nutrients, and contains beneficial microorganisms.
Why Have Your Lawn Treated with Compost Tea?
Organic compost tea has a number of positive effects on your lawn, including:
Adds nutrients to your lawn.
Compost tea contains a number of important macronutrients that are beneficial to your lawn—including magnesium and potassium, while also containing helpful micronutrients, such as iron and zinc. Applying such nutrients can boost overall soil quality.
Reaches important areas of your lawn.
Compost tea reaches deep into the soil, it also comes into contact with leaves, and it’s absorbed through foliar feeding.
Helps to control weeds.
Adding compost tea improves soil quality, which in effect discourages weed growth (notably, some weeds thrive in lawns that don’t contain a sufficient amount of nutrients).
Helps with repelling insects.
Compost tea can contain microbes effective against chitin, a biopolymer that forms the exoskeletons of insects; it can also improve overall plant quality in a way that makes plants less susceptible to harmful insects in the first place.
Helps with plant disease control:
According to the Northwest Center for Alternatives to Pesticides, compost tea has shown some promise in controlling diseases in plants when applied as root drench—helping against some soil-borne diseases.
Applying Organic Compost Tea To Your Lawn
During the application process, LUNSETH blanket applies the aerated compost tea to your entire lawn. The lawn will green up quickly, so results are seen right away. This is a great way to give your lawn a mid-season boost.
Adding compost tea to your organic lawn care plan can be an effective means of increasing microorganisms, improving your soil quality and the overall health of your lawn. By applying compost tea you can trust that you’re utilizing a safe, organic solution that excludes pesticides and synthetic chemicals.
Last month we reviewed the process for a sustainable lawn renovation. This month we provide tips to give your new yard its best chance of thriving. The University of Maryland Extension provides excellent guidance.
Watering
Once seed germination has begun do not let the seed dry out
A newly seeded lawn requires daily watering during dry periods.
If there’s a stretch of windy and dry days, your grass may require several light waterings a day.
Sandy soils dry out quickly, require more watering, and using a light mist is best.
Mature grass seedlings require less frequent watering, but they should be watered longer when you do.
It’s best to water earlier in the day so the grass does not remain wet overnight.
Mowing
Mowing lawns too short or infrequently causes grass to become susceptible to drought injury, weed infestations (especially crabgrass), and foot traffic injury.
Mow new turf when it reaches a height one-third higher than your normal mowing height. Usually this is four to six weeks after seeding.
Remove only one-third of the grass’s height in each following mowing. Removing too much of the leaf blade at each cutting stresses the new lawn.
Soil should be dry enough so that ruts are not formed by the wheels of the lawnmower.
Mowing typically needs to be done on a weekly basis during the growing season.
Fertilizing
Follow-up applications of fertilizer are made as part of a regular maintenance program.
Organic Lawns by LUNSETH’s organic fertilizer solution provides a proven alternative to chemically-based lawn care — delivering a number of benefits that aren’t possible when treating your lawn synthetically. Being 100% organic means our fertilizers contain a purely balanced food source and do not feature synthetic chemicals that can be detrimental to your health and harsh on your lawn. By hiring us to apply our 100% OMRI-certified organic fertilizer to your lawn, your grass won’t just look great, it’ll be healthy in a way that’s very environmentally advantageous.
Weeds
Weeds have been resting all winter and can’t wait to shoot through and start growing. Thin or bare soil areas combined with sunlight and warm soil temperatures create a perfect opportunity for germination of many of our annual weeds.
These weed seeds aren’t just perennials that lay dormant over the winter. They can be blown in by the wind or be carried in by our bird friends. Early spring is the time to start looking for these intruders and taking steps to reduce their spread.
Read LUNSETH’s Blog Post, “Handle Spring Weeds Now or Pay the Price Later”, to learn about some of the most common weeds we see in Minnesota, along with our tips for getting them under control.
Traffic
Young seedlings are easily injured. Newly seeded areas should be restricted from foot traffic for a least a month after the seed has germinated or until the new lawn has been mowed at least a couple of times.